
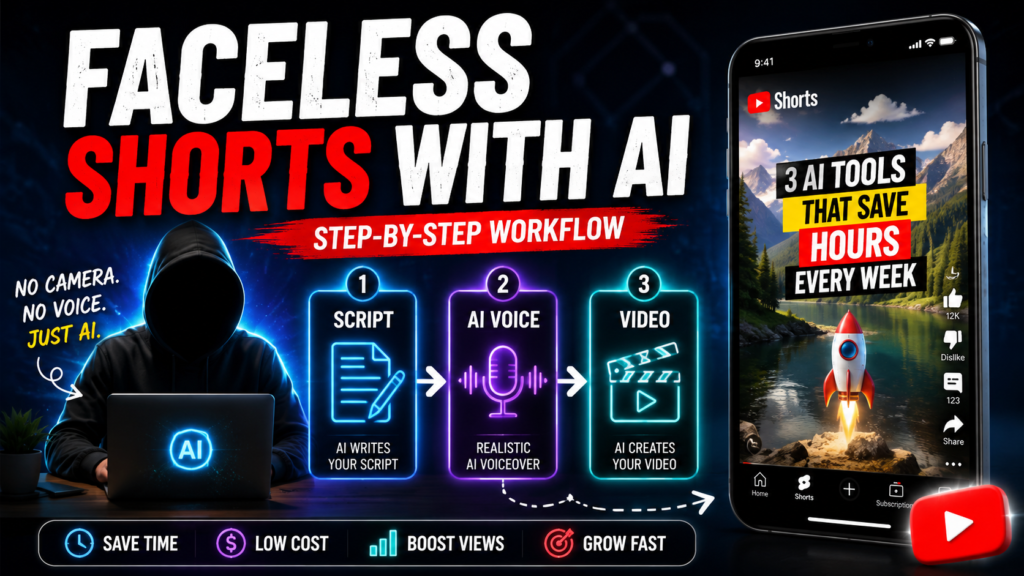
You don’t need a camera to grow with Shorts. You don’t even need to record your own voice. Today, AI can help plan topics, write scripts, create narration, generate visuals, add captions, and speed up editing.
A faceless YouTube Short with AI is a vertical video created without showing the creator on camera. Instead, it uses voiceovers, stock footage, screen recordings, animation, AI images, or generated video scenes.
The basic workflow stays surprisingly simple:
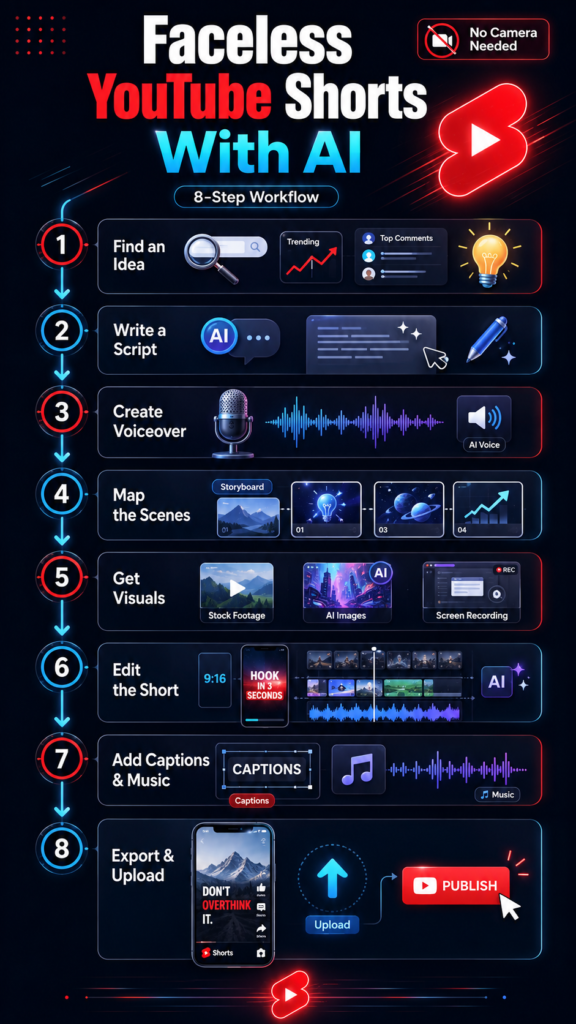
Idea → Script → Voiceover → Visuals → Editing → Captions → Upload
AI handles much of the heavy lifting. You still make the creative decisions. That human layer matters because bland automation rarely keeps viewers watching.
This guide shows you the complete process. You’ll also learn free and faster paid methods.
The Quickest Way to Make a Faceless YouTube Short With AI
Creating faceless YouTube Shorts with AI becomes easier when you separate production into small tasks. Each tool solves one problem, while your editing ties everything together. You can use free apps for most steps, though paid tools usually reduce manual work and save production time.
- Choose one clear topic your audience already cares about.
- Write a short script using an AI script generator.
- Create narration with an AI voice generator.
- Split the script into small visual scenes.
- Find or generate visuals matching each sentence.
- Edit everything vertically inside an AI video editor.
- Add captions, music, and visual changes for retention.
- Export and upload through YouTube or YouTube Studio.
A simple free stack could be ChatGPT → Pexels → CapCut → YouTube. A faster setup might combine ChatGPT → ElevenLabs → Revid AI → YouTube.
Revid AI can handle several parts of the faceless video workflow in one place, including scripting, visuals, voiceovers, captions, and editing. Try Revid AI here →
What You Need Before Creating Your First Faceless YouTube Shorts
Great tools can’t rescue a weak idea. Before opening an editor, choose your niche, target viewer, and one clear promise for each video. Then prepare basic tools for scripting, voice generation, visuals, captions, and editing. Keeping your setup simple makes publishing far easier.
| Task | Free or Low-Cost Option | Faster Paid Option |
| Script | ChatGPT or another AI assistant | Premium AI assistant |
| Voice | Built-in text-to-speech | ElevenLabs |
| Visuals | Pexels, Pixabay, Canva | AI image or video generator |
| Editing | CapCut | Revid AI, VEED, InVideo |
| Music | YouTube Audio Library | Licensed music service |
Good faceless YouTube shorts niches include AI tips, productivity, history, science facts, business stories, travel, tutorials, and book summaries. Pick something you can discuss repeatedly. One viral idea won’t build a channel by itself.
Step-by-Step Workflow for Making Faceless YouTube Shorts With AI
The easiest way to learn this process is through one example. We’ll create a Short titled “3 AI Tools That Save Freelancers Hours Every Week” and carry that idea through every production stage.
Step 1 — Find a Short Idea People Will Actually Watch
Start with demand instead of asking AI for random ideas. Check YouTube suggestions, creator comments, Reddit discussions, and Google Trends for recurring questions. Then ask AI to expand proven topics.
Try this prompt:
Generate 15 faceless YouTube Shorts ideas for freelancers interested in AI productivity. Each idea should promise one useful takeaway and fit a 30–60 second video.
Reject vague ideas immediately. “Useful AI tools” feels flat. “Three AI tools that save freelancers five hours weekly” gives viewers a reason to stop scrolling.
Step 2 — Write a Short Script With AI
A good faceless YouTube Short sounds spoken, not written. Use a simple structure: hook → value → payoff → CTA. Keep introductions tiny because attention disappears quickly.
Try this prompt:
Write a 45-second YouTube Short for freelancers. Cover three AI tools that reduce repetitive work. Start with a curiosity-based hook. Use short conversational sentences. Give one concrete use case per tool. Finish with a simple follow prompt.
Need better prompting skills? Read Bloggersta’s guide to prompt engineering in AI.
Then edit the draft yourself.
Weak hook: “Here are three useful productivity tools.”
Better hook: “These three AI tools can cut hours from your weekly workload.”
Small edits make a big difference.
Step 3 — Turn the Script Into an AI Voiceover
Next, convert your script into narration. You can use built-in text-to-speech, a dedicated AI voice generator, or your own licensed cloned voice.
Popular choices include ElevenLabs, CapCut, Canva, VEED, and Revid AI. Compare voices for pronunciation, pacing, emotional range, natural pauses, and commercial permissions.
Don’t automatically choose the deepest dramatic voice. It often sounds fake after twenty seconds.
Instead, match the voice with your niche. Business content usually suits clear delivery. Story channels may need warmer emotion. Tutorial videos often work better with steady pacing.
Never clone someone else’s voice without proper permission.
Step 4 — Break the Script Into Visual Scenes
Here’s where many faceless videos fall apart. Creators write decent narration, then throw unrelated stock clips behind it. The result feels like wallpaper.
Break your script into short visual beats. Each scene should support the spoken line.
For example:
| Voiceover | Visual | Screen Text |
| “Stop wasting two hours on proposals.” | Messy notes on screen | “Save 2 Hours” |
| “ChatGPT can structure rough notes.” | ChatGPT screen recording | “Tool #1” |
| “Canva speeds up client visuals.” | Canva project clip | “Tool #2” |
Think of the storyboard like a map. Without it, editing becomes guesswork.
Step 5 — Create or Find Your Visuals
Now collect footage for every scene. Stock video works well for travel, offices, lifestyle, and general business topics. Pexels and Pixabay are useful starting points.
AI images work better for imaginary scenes and stylized storytelling. Text-to-video tools help when stock footage doesn’t match your idea.
Screen recordings often beat both options for software content. Showing an actual feature feels more believable than displaying generic laptop footage.
Before publishing, check each platform’s license terms. Free media doesn’t automatically mean every commercial use carries identical permissions.
Step 6 — Assemble the Short in an AI Video Editor
Once your assets are ready, place the voiceover first. Then sync every visual with the matching sentence. Keep the project vertical using a 9:16 layout, which suits Shorts viewing.
CapCut, Canva, and VEED give you more manual control. You can adjust scenes, text, timing, zooms, and transitions yourself.
AI-first tools can reduce those steps. Revid AI, for example, can combine several production tasks inside one workspace. Our Revid AI review explains its features and limitations in more detail.
You can also compare options in our guide to AI video editors for short-form content.
Instead of building every scene manually, you can use Revid AI to create and edit faceless short-form videos from one workspace. Create Your First Video With Revid AI →
Step 7 — Add Captions, Music, and Pattern Interrupts
Captions help viewers follow your message without relying entirely on audio. Keep them large, short, and easy to scan. Don’t dump full sentences across half the screen.
Music should sit quietly beneath narration. Sound effects can add punch, though using one every second becomes tiring fast.
Use occasional pattern changes such as:
- B-roll switches
- Text emphasis
- Quick zooms
- Interface close-ups
- Short sound cues
- Scene changes
The goal isn’t constant motion. You want enough variety to prevent the video from feeling visually asleep.
Step 8 — Export and Upload the Short to YouTube
Export your Short as a clean vertical video with clear audio. A 1080 × 1920, 9:16 format is a practical standard for vertical publishing.
Before uploading, check:
- Title accuracy
- Description
- Relevant keywords
- Audience settings
- Caption quality
- Audio levels
- Copyright permissions
- AI or synthetic-content disclosures when applicable
YouTube changes product rules over time. Check the latest requirements through the official YouTube Help Center before publishing large batches.
You can upload through desktop or mobile. That means you can create YouTube Shorts on a PC without filming anything.
Free vs Paid AI Workflow: Which Should You Use?
Your best setup depends on volume, budget, and editing patience. Free tools give beginners enough room to learn scripting and visual storytelling. Paid platforms reduce repetitive steps, which becomes useful once you publish several Shorts weekly and already know which format performs well.
Free Workflow
A practical free route looks like this:
ChatGPT → Free TTS → Pexels → CapCut → YouTube
It suits new creators testing niches. You get more manual control without paying immediately. However, free plans may limit credits, exports, voices, or premium assets.
If you’re publishing several Shorts each week, Revid AI can reduce the back-and-forth between separate scripting, voice, visual, and editing tools. Check Out Revid AI →
Paid Workflow
A faster route could look like:
ChatGPT → ElevenLabs → Revid AI → YouTube
This setup suits frequent publishing and content batching. You’ll spend less time moving files between separate apps, though monthly costs rise.
Start free first. Pay for speed only after your process works.
How to Make Faceless Shorts People Keep Watching
AI can make videos faster, yet speed doesn’t create attention. Viewers stay when each second gives them a reason to continue. Strong faceless Shorts usually open quickly, remove filler, and move toward a clear payoff without dragging the idea past its natural ending.
- Open with tension: Give viewers a problem immediately.
- Reveal the topic early: Don’t hide the subject for ten seconds.
- Cut empty introductions: “Hey guys, welcome back” wastes valuable space.
- Change visuals deliberately: New scenes should support new information.
- Keep captions readable: Short text beats crowded subtitles.
- Track retention: Use YouTube Analytics to spot early drop-offs.
- Test hooks: One stronger opening can change the whole video’s performance.
Common Faceless AI Shorts Mistakes
Most weak AI Shorts don’t fail because of software. They fail because creators treat automation like a substitute for judgment. AI can draft and assemble content quickly, yet viewers still notice poor storytelling, recycled scenes, robotic voices, and factual mistakes within seconds.
- Publishing raw AI output: Edit scripts and generated scenes.
- Using random B-roll: Match visuals with narration.
- Starting too slowly: Make the promise obvious early.
- Choosing robotic voices: Adjust pacing and pronunciation.
- Overloading captions: Keep screen text digestible.
- Copying competing channels: Original angles build stronger brands.
- Ignoring copyright: Check footage, music, images, and voices.
- Scaling too early: First discover which format viewers actually watch.
- Skipping fact checks: AI-generated claims can still be wrong.
Can Faceless AI YouTube Shorts Be Monetized?
AI-assisted Shorts can potentially earn revenue, though monetization depends on the content itself. YouTube focuses heavily on originality, viewer value, rights, and policy compliance. Mass-produced or repetitive uploads create greater risk than simply using AI during production.
- Write original scripts rather than copying competitors.
- Add meaningful commentary or storytelling.
- Edit visuals instead of recycling identical templates.
- Use media you have permission to publish.
- Check facts before uploading.
- Review current YouTube monetization policies.
- Check disclosure rules for realistic altered or synthetic media.
Think of AI as production help. It isn’t a shortcut around platform rules.
How to Scale Faceless Shorts Without Making Them Feel Automated
Batching can reduce repetitive work without flattening your creative style. Instead of making one video from scratch daily, group similar tasks together. Research ideas first, then write scripts, produce voiceovers, prepare visuals, edit, and review everything before scheduling publication.
- Monday: Research ten promising ideas.
- Tuesday: Draft and edit scripts.
- Wednesday: Create narration and visuals.
- Thursday: Edit several Shorts together.
- Friday: Review facts, rights, titles, and scheduled uploads.
AI handles repetitive production well. Keep human control over hooks, storytelling, accuracy, brand voice, and final quality.
Revid AI brings several faceless-video creation steps together, making it easier to move from an idea to a finished Short. Start Creating With Revid AI →
Final Takeaway
Making faceless YouTube Shorts with AI isn’t complicated once the workflow becomes familiar. Start with one useful idea, write a tight script, create narration, match visuals, edit vertically, add captions, review everything, then publish.
Don’t rush into full YouTube Shorts automation immediately.
Create several videos manually first. Watch what people finish, skip, replay, or comment on. Those signals tell you what deserves scaling.
When manual editing starts eating too much time, an AI-first editor may help. If you’re considering that route, read our Revid AI review before choosing your production setup.
Good faceless content still needs a human brain behind it. AI simply gives that brain a much faster toolbox.
2 Responses