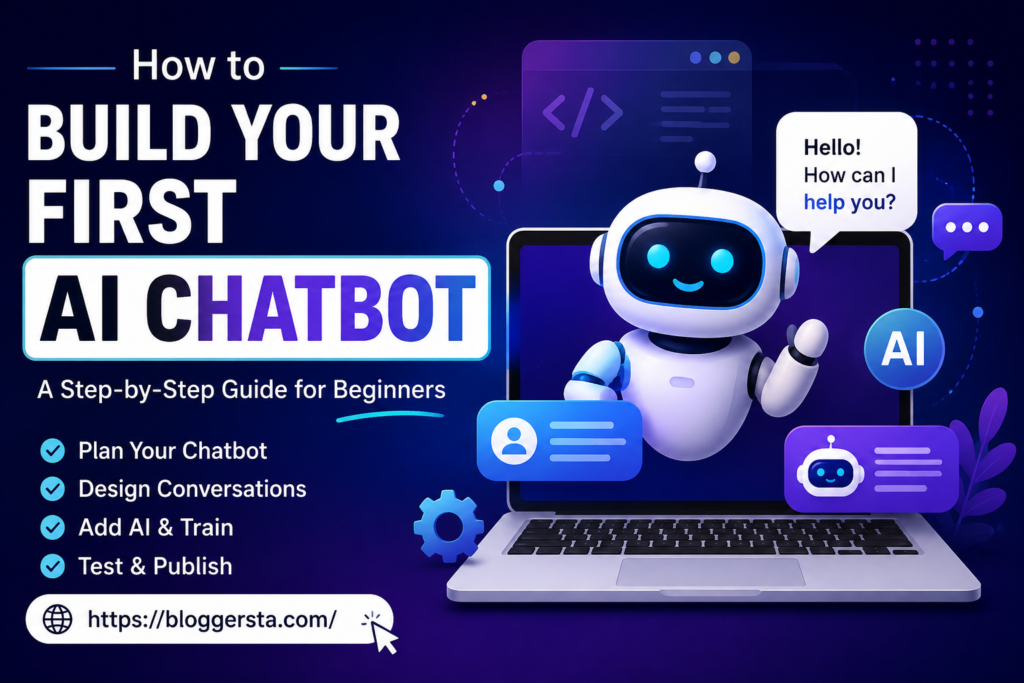
Build Your First AI Chatbot without advanced coding skills and automate customer support, answer questions, and assist users 24/7.
AI chatbots are growing fast, and studies show that over 80% of businesses will use chatbot automation in the coming years. This clearly shows how important chatbot technology has become today.
In this guide, we will use Classifier as our example platform. Classifier is a no-code AI chatbot builder that is ideal for complete beginners — no programming knowledge is required. You simply connect your website, train the bot, and publish it.
If you are using a different platform, such as Tidio, Chatbase, or ManyChat, do not worry — the overall steps remain the same. Only the button names and menu locations may differ slightly. Let’s get started.
Create a bot by using your website URL
Your website URL lets you quickly build your first AI chatbot. Using your website URL is the fastest way to get started — the platform automatically scans your content and trains your chatbot for you.
1. Set up your chatbot
On Classifier, go to the Chatbots tab and select + add chatbot. Then choose the Website option.
2. Train Your Chatbot Using Your Website
Enter your website URL and click Continue. Then, select how you’d like the system to scan your site:
- Scan a full page
- Scan only nested pages
- Scan a single page
If you prefer not to include certain pages, you can use the green toggle before training to disable them. Then click Continue.
- Also Read: How to Use AI in Photoshop?
3. Tune your chatbot
- The final step allows you to make changes to your chatbot before it goes live.
- If you want to, you can edit the welcome message.
- Next, select all the basic skills based on your website’s content, such as the Contact Us skill if contact details are available.
- Skills are little chatbot flows designed for a certain task. Now, while some skills are generated automatically based on your website (for instance, FAQ, about, or pricing), others can be added manually.
- You can also find and modify what information is being collected during a website scan. Separate each data with a comma — Company name, address link of site, privacy policy, terms page, social media links, etc.
- After updating all the information, click Continue.
- Your chatbot would be usable for testing, but the training might still be ongoing. And it is entirely complete when the “Test your bot” button has finished loading.
- At times, you can add more knowledge sources. This data is collected by the AI Knowledge module, and ChatBot AI Assist uses this to answer the user queries.
4. Test your AI chatbot
The testing tool allows you to test your chatbot before it goes live with real users in the ChatBot web app.
Open your chatbot and click on “Test your bot” to converse. A blue line is also drawn in the active flow during that individual chat.
AI Assist — that helps to generate replies based on the trained data you provided (your website, help center, or knowledge base), using AI capabilities.
You have different options here if you click the three dots in the top right corner:
- Display or hide Debug mode: all the flow of actions in chat.
- Returning customer: Tests the conversation as a returning user
- Follows the steps in the tree: Shows where the conversation is situated in the flow
- Typing indicator show/hide: displays typing animation
- New chat: Start a new conversation
The first thing the chatbot does is look for responses in the flow of conversation. If it finds nothing, it uses your trained knowledge base & AI Assist to provide the best possible answer.
5. Publish your chatbot
Any time you make changes, it saves as a draft version. This allows you to work on updates without disrupting the chatbot that is currently live.
Once you’ve published your chatbot, it will continue to work while you edit the draft in the background.
Click the Publish button to publish your modified chatbot once you are satisfied with all of these changes.
There is also an option called Version History, from which you can check previous versions at any time.
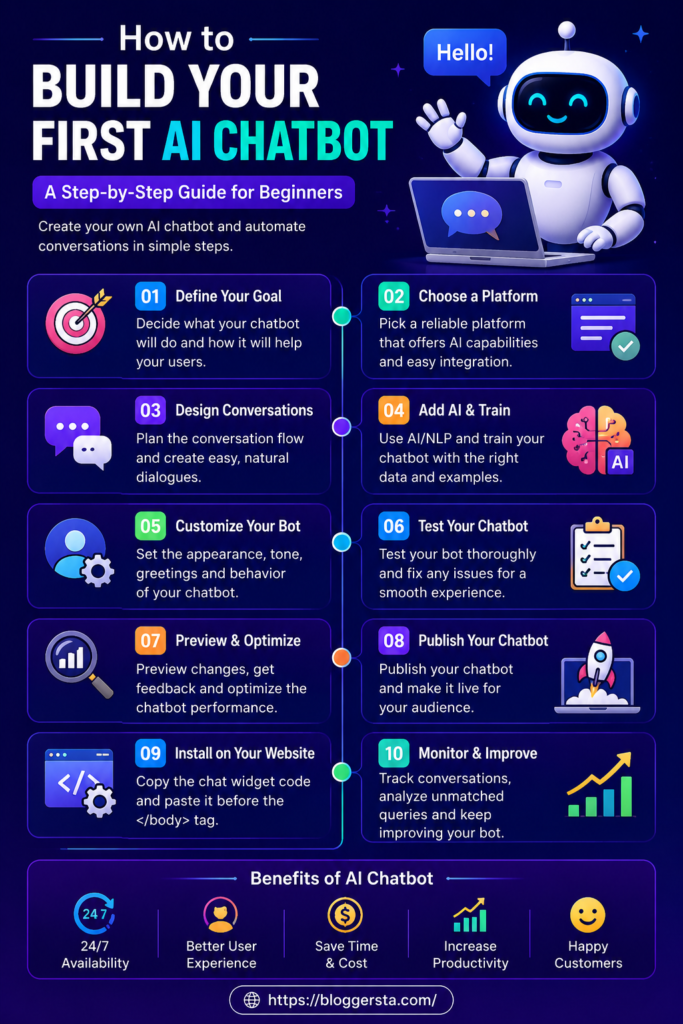
Create and configure your Chat
First, to configure your Chat Widget, open your AI bot and navigate to the Integrations section. Now, hit the Connect for Chat Widget option.
Bot settings. In General, you can adjust your bot as required:
- Bot name: Enter your bot’s name
- Bot description: A piece of text given on the welcome screen, that expresses your business and how this bot can help with it
- Bot avatar: An image that will show up with every message of the bot
- Language: Select your chatbot language
- Welcome screen: Screen with pre-chat information and social media links
- Custom links: insert social media links directly in the welcome screen of the chat widget
- What does the ChatBot offer? Chatbot is also a comprehensive tool with a range of features, and the best part is that you can try it for free.
- Text Field: Enable the user input field accordingly
By switching off the text field, ensure that your chatbot sends rich messages. Furthermore, if the flow uses any question action, the text field will appear for the user to respond, and will then hide itself once the response is received.
Customize your Chat
Click on the Integrations section, then Chat Widget tab to customize your Chat Widget. Then open the Appearance tab.
You can customize your chatbot’s appearance as follows in the appearance settings:
- Theme and color: Change the main widget theme, colors, and background image. If you already know what color settings to use, you can either use ready-made ones or select the advanced settings for full customization.
- Select background: Add an image as a background, and crop it if desired
When you’re done, remember to click the Save button to apply your changes.
Set up a greeting
The Greetings feature allows you to have a pop-up message on top of your minimized chat widget. It encourages visitors to engage with your chatbot immediately.
You can also decide when to greet someone. For instance, you can trigger it after the user spends a specific amount of time on a page, visits a particular URL, or lands in a specific part of your website.
To configure, click + Add condition and select the desired rule from the list.
Preview the Chat
Use the Sample Page to preview your chatbot and confirm everything is working correctly before going live.
Click the Open preview button at the bottom left to view and interact with your chatbot as it will look in real time.
You can share this Sample Page link with your team or testers to collect feedback and enhance the user experience.
The right side of the settings screen allows you to view different views, such as minimized chat, welcome screen, and active chat screen.
Publish your chatbot so that when you test, you see all of the latest changes in the preview.
How to Install Your AI Chatbot on Your Website
To add the ChatBot widget to your website, open your AI chatbot and navigate to the Integrations section. Then, choose the Chat Widget.
Go to the Publish section, click Copy code, and paste it into your website’s source code just before the closing </body> tag.
After adding the code, refresh your website. The chat widget will appear in the bottom corner of your page.
Free AI Chatbot Platforms for Beginners
If you are just getting started, several platforms let you build an AI chatbot for free without writing a single line of code. Here are some beginner-friendly options:
- Classifier — Best for website-based chatbots
- Chatbase — Build a chatbot by uploading documents or a URL
- Tidio — Great for eCommerce and customer support
- Google Dialogflow — Free tier available, slightly technical
- ManyChat — Best for WhatsApp and Instagram bots
Conclusion
Creating an AI chatbot is really not that difficult. This allows anyone creative enough, with the right data and tools (primarily machine learning), to build an intelligent bot that can respond to queries, assist users, and run 24/7, to improve communication and mechanized tasks.
So you now know how to build your first AI chatbot; we are there for everything from setup to testing and publishing. The key is to just keep it simple, run this bot through the motions, and iterate on real user feedback.
Now it is time to take action — start building your AI chatbot today and turn your idea into a fully functional assistant for your website or business.
FAQs
1. What is an AI chatbot online?
An online AI chatbot is a browser-based tool you can use to chat, answer your queries, and automate tasks without installing any software.
2. What is an AI chatbot character?
Chatbot AI is a chatbot character with certain personalities, like a teacher, assistant, or customer service operator, that helps make the conversation more natural.
3. What is an AI chatbot GPT?
A GPT AI Chatbot is a type of chatbot that uses GPT-based models (Generative Pretrained Transformer), which have been trained to analyse questions using existing data and provide human-like answers while helping with writing, code generation, etc.
4. What are some AI chatbot examples?
Some well-known examples include customer support bots embedded in websites, virtual assistants like ChatGPT, and business bot scenarios that help answer frequently asked questions or manage orders.
5. What is an AI chatbot assistant?
An AI chatbot assistant is a digital tool that can handle tasks like answering questions, helping with writing, and managing search queries — all through a simple conversational interface.