
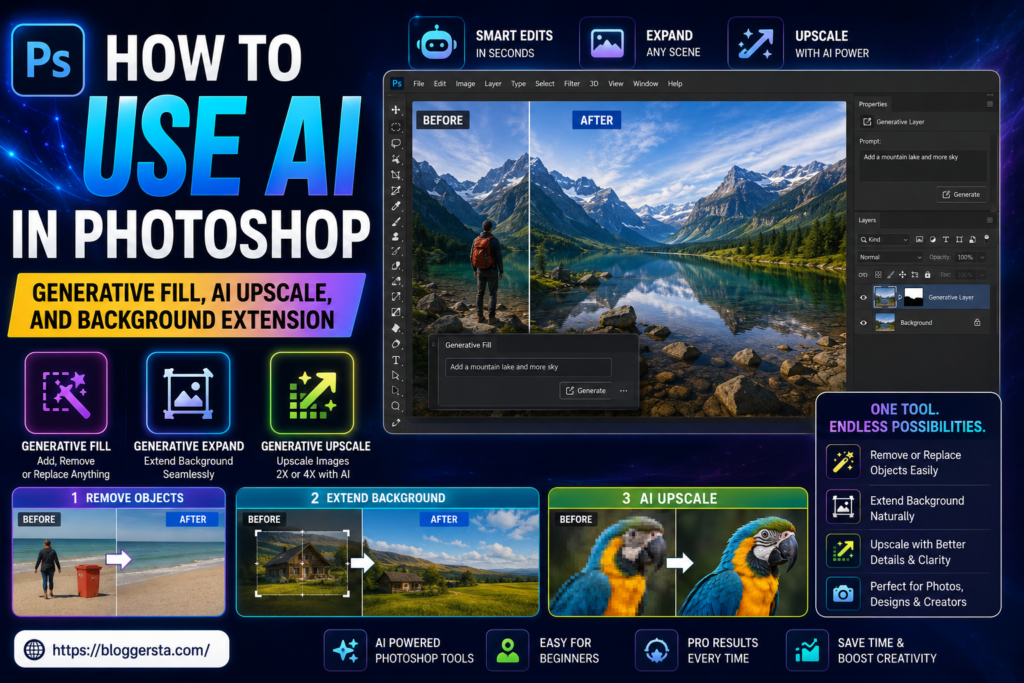
Photoshop does not feel like a tool only experts can handle after years of practice anymore. Adobe’s current AI tools now cover object edits, canvas extension, and resolution improvement, but the trick is knowing which feature matches which job.
This guide walks through the parts most people actually search for: adding or removing objects, learning how to extend background in Photoshop AI, and using AI Upscale in Photoshop without getting results that look strange or overworked.
If you want to learn how to use AI in Photoshop, start with Generative Fill for adding or removing content, Generative Expand for extending the canvas, and Generative Upscale or Camera Raw Enhance for improving resolution.
The best results usually come from picking the right AI tool for the job instead of forcing one feature to do everything.
| Adobe says Super Resolution doubles the width and height and is useful for cropped images. | Best Photoshop AI Tool | Best Photoshop AI Tool |
| Remove or replace objects | Generative Fill | Adobe describes it as a way to add, remove, or modify content with text prompts. |
| Extend a photo outward | Generative Expand | Adobe places it in the Crop workflow and lets you generate new canvas space from the Contextual Task Bar. |
| Improve size and detail | Generative Upscale | Adobe says Super Resolution doubles the width and height and is useful for cropped images. |
| Improve RAW or cropped photos | Camera Raw Enhance with Super Resolution | Adobe says Super Resolution doubles width and height and is useful for cropped images. |
How To Use AI In Photoshop: What AI Tools Are Available Right Now
Adobe’s current help pages point users to a short list of AI tools that cover most beginner jobs: Generative Fill, Generative Expand, Generative Upscale, Camera Raw Enhance, plus other retouch tools such as the Remove tool and Neural Filters that still appear in the current Photoshop help structure.
That sounds like a lot at first. Still, the split is simple: one tool edits a selected area, one stretches the frame, and one improves image size and detail.
The Main Photoshop AI Tools Beginners Should Know
- Generative Fill adds, removes, or changes content inside a selection with text prompts.
- Generative Expand extends the canvas and fills the new space from the Crop workflow.
- Generative Upscale improves image quality with 2x or 4x output choices and AI model selection.
- Camera Raw Enhance includes Super Resolution, Denoise, and Raw Details for photo-first cleanup.
- Adobe’s help pages also keep the Remove tool and Neural Filters in the current Photoshop retouch and filter system.
Which Photoshop AI Tools Need Internet Access
Adobe’s current generative workflows are model-based, and the help pages for Generative Fill, Generative Expand, and Generative Upscale all point to AI models rather than a simple local resize or fill command.
In plain terms, these are not old-school tools with a fresh coat of paint. They work through Adobe’s current generative system, so it helps to think of them as guided AI actions, not basic menu commands.
Why The Contextual Task Bar Matters
The Contextual Task Bar matters because Adobe keeps routing the key generative actions through it, especially for Fill and Expand. If you ever feel lost, that bar is often the first place worth checking.
It acts like a shortcut lane. Instead of digging through menu after menu, you often get the next useful action right where you are working.
How To Use AI In Photoshop Before You Start Editing
Before you click anything flashy, start with a clean setup. A lot of bad AI edits do not come from the model at all. They come from rushing into a messy file and hoping the software will read your mind.
Adobe’s help content also reflects current naming and menu paths, so using a current version makes it easier to follow the same steps described here for Fill, Expand, Upscale, and Camera Raw Enhance.
1. Update Photoshop First
Current Adobe help pages show Generative Fill, Generative Expand, and Generative Upscale as live workflows with model pickers and specific menu paths, so older builds may not match what you see in this guide.
If a button seems missing, the version is often the first thing to check. That alone can save a lot of head-scratching.
2. Open The Right Type Of Image
For quick object edits or canvas extension, a normal image file works fine because Generative Fill and Generative Expand are built around selections and canvas changes inside Photoshop.
For photo-heavy cleanup and detail work, Camera Raw is a stronger starting point because Adobe ties Super Resolution, Denoise, and Raw Details to the Enhance workflow there.
3. Work Carefully From The Start
Keep an untouched copy of the image before you begin. That small habit makes it easier to compare the AI result with the original and back up when a generated area looks off.
Also, zoom in early. AI can look impressive at full screen and still fall apart around edges, hair, reflections, or repeated textures.
How To Use AI In Photoshop For Removing Or Adding Objects
This is where most people start, and for good reason. Removing a distracting sign, adding a prop, or fixing dead space in a photo feels like magic the first time it works well.
Adobe describes Generative Fill as a tool for adding, removing, or modifying content inside a selected area, which makes it the main feature for this kind of edit.
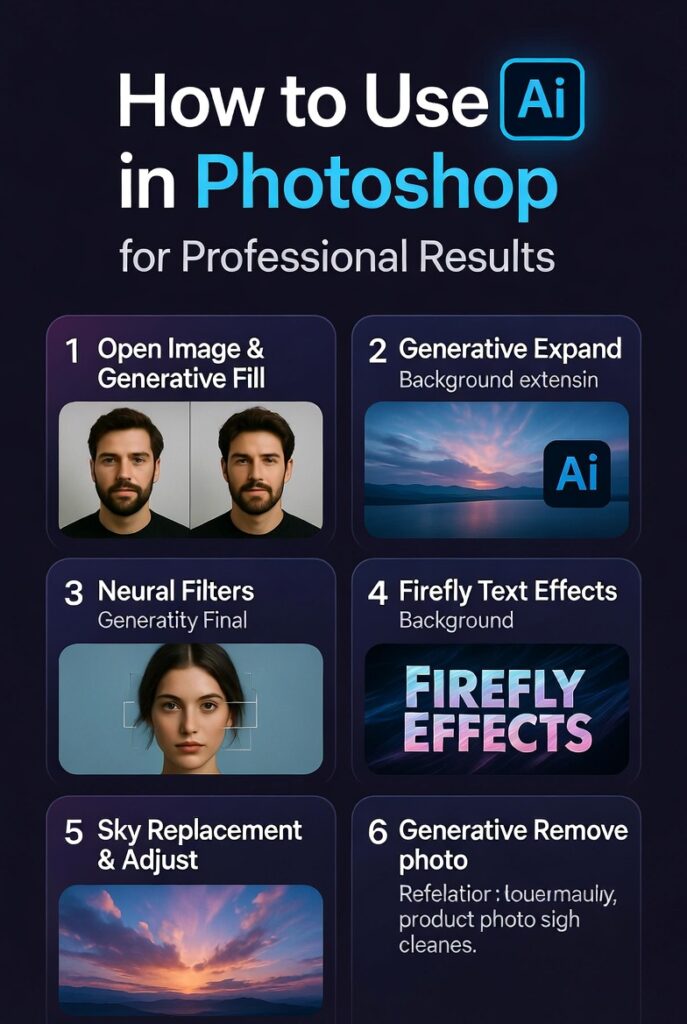
How To Use AI In Photoshop With Generative Fill
- Make a selection around the object or area you want to change.
- Click Generative Fill from the Contextual Task Bar.
- Add a short prompt if you want new content, or use a simple removal approach when you want Photoshop to replace the area naturally.
- Generate the result and compare the variations before keeping one.
That workflow is quick, but it works best when the selection is not sloppy. A neat selection gives Photoshop a better chance to match nearby color, depth, and structure.
How To Write Better Prompts In Photoshop AI
Keep prompts short and visual. Think like a photo editor, not a novelist. “Small wooden bench” usually works better than a long paragraph.
The reason is simple. Photoshop AI is being asked to fit new content into an existing image, so clear object words and scene clues are usually enough.
When To Use The Remove Tool Instead Of Generative Fill
Adobe’s current help system still separates standard removal tools from Generative Fill, which is a good reminder that not every problem needs a full generative edit.
For dust spots, tiny distractions, wires, or small background clutter, a removal-first tool can feel cleaner and faster than generating new content across a big selected area.
Common Mistakes That Make AI Edits Look Fake
The first mistake is selecting too much. When the selected area is huge, Photoshop has to invent more content, and the odds of odd textures or awkward lighting go up.
The second mistake is skipping cleanup. Even a strong AI result may still need a small mask, a touch of healing, or a quick edge fix.
How To Extend Background In Photoshop AI Step By Step
When people search for how to extend background in Photoshop AI, they usually want one thing: more room without rebuilding the image by hand. Adobe’s current Generative Expand workflow is built exactly for that kind of job.
It is especially handy when a photo feels too tight. Maybe the subject is fine, but the crop is cramped and the design needs breathing room. That is where this tool earns its keep.
How To Extend Background In Photoshop AI With Generative Expand
- Select the Crop tool.
- Drag the crop handles outward to create extra canvas space.
- Choose Generative Expand from the Contextual Task Bar.
- Generate the result and review the variations in the Properties panel.
Adobe also shows model choices for Generative Expand in the current help content, including Firefly options in the model picker. That matters because newer versions can give you more than one look from the same expansion area.
Best Times To Extend Background In Photoshop AI
- Turning a vertical image into a wider banner.
- Making room for text in an ad or thumbnail.
- Saving a product photo that was framed too tightly.
- Resizing an image for a new layout without cutting off the subject.
How To Make Background Extensions Look Natural
Check perspective first. A background can look “almost right” and still feel wrong if the lines or depth shift oddly near the edge.
Then check patterns. Brick walls, leaves, fabric, and windows can repeat in obvious ways, so it helps to compare the generated variations before picking one.
AI Upscale In Photoshop: The Best Ways To Improve Resolution
Ai upscale in Photoshop is a different job from object editing. You are not asking Photoshop to add a tree or remove a bag. You are asking it to improve size, sharpness, and detail without making the file look artificial.
Adobe now gives users two solid routes for this: Generative Upscale inside Photoshop and Super Resolution through Camera Raw Enhance. That is good news because one path suits quick design work, while the other is often better for photo-first cleanup.
What AI Upscale In Photoshop Actually Does
Adobe says Generative Upscale can improve quality, sharpness, and clarity, and it gives you 2x or 4x output choices plus AI model selection.
Adobe also says Camera Raw Super Resolution creates an enhanced image with 2x the width and 2x the height of the original, which equals 4x the total pixel count.
How To AI Upscale In Photoshop With Generative Upscale
- Open the image in Photoshop.
- Go to Image > Generative Upscale.
- Pick 2x or 4x scaling.
- Choose the AI model for the upscale.
- Review the output after Photoshop creates the new result.
This is the faster route when you are already working inside Photoshop and want a direct answer to how to AI upscale in Photoshop without switching to another workspace.
Generative Upscale Vs Standard Resizing
Standard resizing mostly stretches existing pixels. AI upscaling tries to improve clarity and detail as the file grows, which is why the result can look cleaner when the source image is small or soft.
That does not mean bigger is always better, though. After upscaling, check hair, edges, fabric texture, and skin so the image does not drift into a waxy or unnatural look.
How To AI Upscale In Photoshop With Camera Raw Super Resolution
- Open the image in Camera Raw.
- Right-click the image and choose Enhance.
- Select Super Resolution in the preview dialog.
- Review the preview and run the enhancement.
- Send the new file back into Photoshop for any extra retouching.
Adobe says Super Resolution is especially useful for cropped images, and it also supports the same file types as Raw Details, plus extra types such as JPEG and TIFF. That makes it a strong path when you want more believable photo detail, not just a larger file.
Which Upscaling Method Should You Choose
Use Generative Upscale when you want a quick Photoshop-based route with 2x or 4x scaling and model choice in one place.
Use Camera Raw Super Resolution when the image is part of a photo workflow, especially when you also want tools like Denoise or Raw Details in the same cleanup path.
Best Practices For Using AI In Photoshop Without Ruining The Photo
The smartest way to use Photoshop AI is to think in small moves. One tool removes. One tool extends. One tool upscales. Once you stop treating AI like a magic button, the whole process gets easier, and the results usually look better.
Adobe’s current help pages also show that newer Photoshop AI workflows are becoming more guided, with model pickers in Fill, Expand, and Upscale, plus other retouch tools such as Harmonize listed in the current repair and retouch area. That means the app is giving users more control, but it still pays to look closely before you save anything.
Start Small, Then Build
Fix one area at a time. Remove the distraction first. Extend the background second. Upscale near the end of the image still needs more size.
That order keeps things cleaner. It is much easier to judge what the image needs when you are not stacking five AI edits on top of each other all at once.
Check The Details At 100% Zoom
Look closely at hands, shadows, reflections, seams, and repeated textures. Those are the places where AI mistakes tend to show up first.
A result can look great from across the room and still fall apart when you zoom in. That little check often separates a polished image from one that feels rushed.
Pair AI With Regular Photoshop Skills
AI gets you most of the way. Manual touch-ups finish the job. A small mask, a healing pass, or a color tweak can turn a decent AI result into one that feels natural.
That balance matters. The goal is not to let AI do everything. The goal is to save time without letting the image lose its sense of realism.
FAQs
1. How do you use AI in Photoshop for beginners?
Start with Generative Fill for object edits, Generative Expand for canvas extension, and Generative Upscale or Camera Raw Super Resolution for size improvement.
2. Is AI upscale in Photoshop better than regular resizing?
Often, yes, because Adobe’s AI upscale tools are built to improve clarity and detail rather than only stretching pixels.
3. How do you extend background in Photoshop AI?
Use the Crop tool to add canvas space, then run Generative Expand from the Contextual Task Bar and review the generated variations.
4. How do you AI upscale in Photoshop for RAW photos?
Camera Raw Enhance with Super Resolution is the cleaner starting point for many photo-first workflows.
5. Does Photoshop AI work in one single way for every edit?
No. Adobe’s current tool set splits the work across Fill, Expand, Upscale, and Camera Raw Enhance, and each one fits a different job.
Final Thoughts On How To Use AI In Photoshop
The easiest way to think about how to use AI in Photoshop is this: Generative Fill handles object edits, Generative Expand handles extra canvas, and AI Upscale in Photoshop handles size and detail work through Generative Upscale or Camera Raw Super Resolution.
That simple split keeps you from using the wrong tool for the wrong problem. And honestly, that is half the battle. Once you match the feature to the task, Photoshop AI starts to feel less like a gimmick and more like a very practical helping hand.